

A hand-cut dovetail looks like it takes years to master. It doesn't, though a few bad ones are part of the deal. The through dovetail is where most people start, and with good reason: everything is visible, mistakes show up early, and the skills it builds — accurate marking, controlled sawing, clean chiselling — carry into every other joint you'll ever cut. Set aside an afternoon, pick two pieces of straight-grained scrap, and work slowly. Speed comes later.
What You'll Need
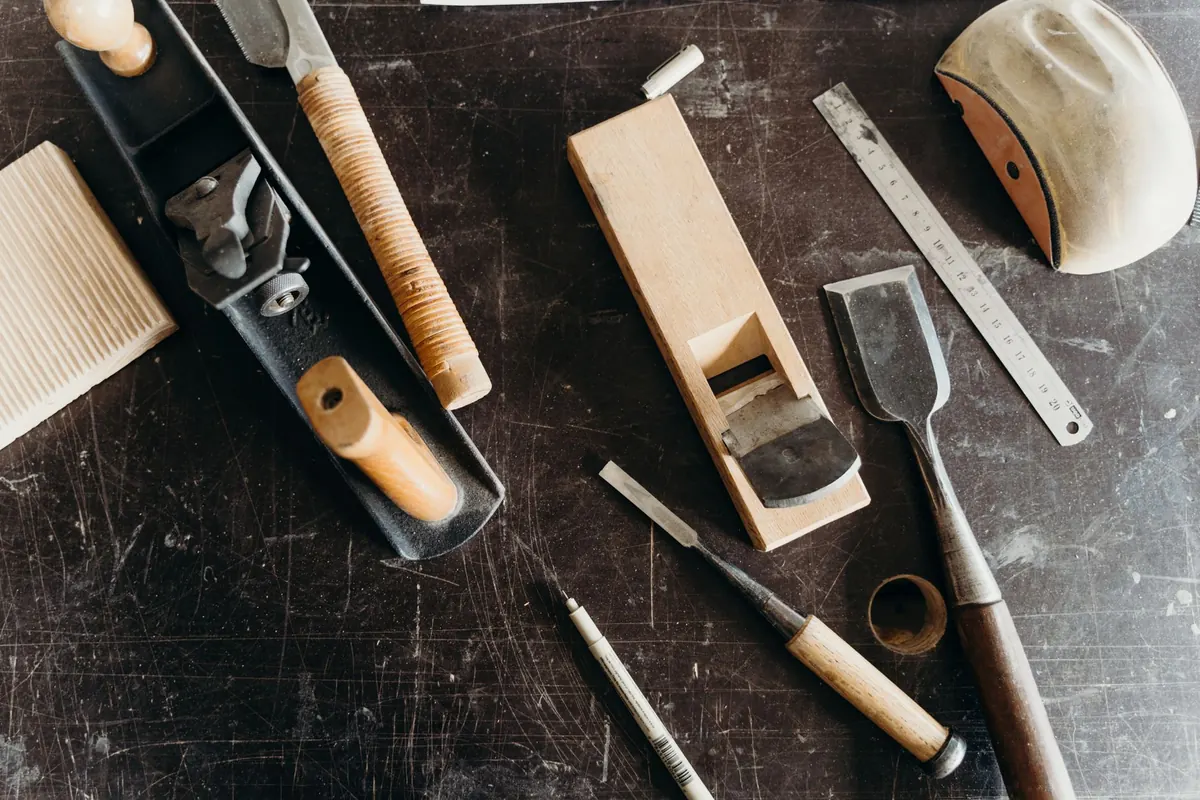
You don't need a workshop full of tools for this joint. You need a small number of good ones, and they need to be sharp.
- A dovetail saw — 15 to 20 tpi, rip-filed, with a fine set. A blunt saw with too much set will wander off the line all day long.
- A marking gauge — wheel type or pin type, set accurately and used with the same pressure every time.
- A 6 mm (1/4 in) chisel and a wider bevel-edge chisel (12 mm / 1/2 in is ideal) for clearing waste.
- A square, a sliding bevel set to your chosen angle, and a marking knife.
- A coping saw or fret saw to remove the bulk between the tails.
- A mallet, a fine pencil, and a couple of pieces of scrap — softwood for your first attempts, hardwood once you've found the rhythm.
Sharpening matters more here than in almost any other job. A chisel that paring feels effortless; a dull one crushes fibres and drags the line out of true. If you can only do one thing before you start, hone the chisel.
The Anatomy of a Through Dovetail
One board carries the tails — the flared, wedge-shaped projections. The other carries the pins that sit between them. The joint is called "through" because the end grain of both boards is visible from either face once it's assembled.
The baseline is the shoulder line scribed around each board, set back from the end by the thickness of its partner. This measurement is the whole joint. If the baseline is out by half a millimetre, no amount of careful sawing will make the boards sit flush.
The slope of the tails follows convention rather than science: roughly 1:6 for softwoods, 1:8 for hardwoods. Softwoods compress more easily, so the steeper angle gives a bit more mechanical grip; hardwoods hold their own and are usually cut shallower. Either way, consistency across the joint matters far more than the exact ratio.
Marking Out
Layout is where the joint is won. Work in this order and don't rush it.
- Square the ends. A joint can't be square if the boards aren't. Check the ends of both boards with a square and plane them true if needed.
- Mark the faces. Pencil a small squiggle on the faces that will end up on the outside of the finished piece. You will thank yourself later.
- Scribe the baseline. Set the gauge to the thickness of the pin board and scribe around all four sides of both boards. Gauge from the face side each time so the lines meet up.
- Lay out the tails. Use the sliding bevel against the end grain and knife your lines across the end. Mark the waste clearly with a pencil cross.
- Leave enough meat. Keep the outer pins at least a chisel's width so they don't crumble, and aim for tails and pins of similar size. Even spacing looks deliberate; uneven spacing looks accidental.
Sawing the Tails
Clamp the tail board in the vise with the end grain up and the face you marked facing you. Start the saw flat, using the top edge of the board as a guide, and take a few light strokes to establish a kerf — a shallow groove — on the waste side of the line. Once the saw is sitting in that kerf, raise the handle until the blade is level and cut down to the baseline.
Two things ruin more dovetails than anything else: cutting on the line instead of beside it, and pushing the saw. Let the teeth do the work. Keep your wrist in line with your forearm, use the whole length of the blade, and stop when the saw reaches the baseline. Then repeat on the other side of the tail.
Once both sides are sawn, take the coping saw and remove the bulk of the waste, staying a millimetre clear of the baseline. Don't be tempted to cut closer with the coping saw — blades wander, and a wander here is a gap you can't fix.
Cut on the waste side of the line, not on it. The line belongs to the joint; the sawdust belongs to the bin.
Chopping Out the Waste
Stand the tail board on a solid surface. Place the chisel vertically with its back edge on the baseline, give it a light tap with the mallet, and you'll sever the fibres cleanly on the line. Work back towards the end grain in light cuts, paring the remaining waste down to that shoulder. Turn the board over and repeat from the other face so the two cuts meet in the middle.
Pare the angled sides of each tail the same way, taking thin shavings rather than hefty bites. Test the chisel's flat back against the sawn face — if you can see light between them, there's still a high spot to remove.
Transferring and Cutting the Pins
Clamp the pin board in the vise end grain up. Sit the tail board on top, aligning the faces and the baselines, and hold it firmly or clamp it in place. Transfer the shape of each tail onto the end grain of the pin board with a fine knife or a sharp pencil held tight against the tail. The thinner the line, the tighter the joint.
Repeat the process: saw down the waste side of each transferred line, remove the bulk with the coping saw, and chop back to the baseline. Take your time over the narrow pins between tails — they're the parts most likely to break if you lever at them with a chisel.
Fitting and Gluing Up
Dry-fit the joint before any glue comes near it. It should go together with firm hand pressure and a few light taps on a scrap block. If it needs real force, something is too tight; find the tight spot by looking for shiny burnished patches on the pins, then pare those areas only. If it drops together and rattles, you've sawn past a line and the joint will need filling — better to start again and note where it went wrong.
When you're happy, apply glue to the mating faces — not to the end grain, which swells and can jam the joint halfway home. Tap it together with a block protecting the wood, check the corners are square by measuring the diagonals, and wipe the squeeze-out with a damp cloth while it's still wet. Once dry, plane the end grain flush with a sharp block plane, working from the outside edges towards the centre so you don't tear out the corners.
Then Do It Again
Nobody cuts a good dovetail first time, and the second one is usually worse because you're thinking about everything at once. Cut five or six in scrap. Keep the first one on a shelf as a benchmark, and you'll be surprised how quickly the later ones overtake it. The joint rewards patience, sharp tools and honest layout far more than talent.
Photo: cottonbro studio / Pexels
Related posts
More stories you’ll love reading