

A bookshelf is the friendliest piece of furniture you can build by hand. It is a box with shelves, every joint repeats, and once you have cut the first housing you have learned the whole job. Oak makes the project feel more serious than pine without making it harder: it planes beautifully with a sharp iron, holds a crisp edge, and looks better after ten years than it did on the first day.
This is the version worth building. Two uprights, four shelves, housed and pegged, no router and no machines. A bench, a vice, and a handful of good hand tools will see it through in a weekend or two.
Start With the Right Oak
Look for kiln-dried European or American white oak, 20–25mm thick. Boards around 200mm wide suit the uprights, and a single wide board makes the simplest shelf. Choose straight-grained stock and avoid big knots near the ends, where you will be cutting joints. Buy about a fifth more than the cut list asks for, because there is always a defect to work around.
Bring the oak into the room where the shelf will live and leave it there for a week or two before you cut anything. Timber that is still settling will move after assembly and pull a carefully squared frame out of shape. Oak dust is also a known irritant, so open the doors and wear a mask when sawing and sanding.
Size the Shelf Around the Books
Measure your tallest book before you decide anything. Add 40–50mm of clearance so you can lift it off the shelf without wrestling. Most hardbacks sit comfortably under 300mm clear, and 320mm gives room for art books and a little air. For depth, 200–250mm holds almost any novel and keeps the unit from swallowing the room.
Span matters more than anything else. A 20mm oak shelf spanning 900mm will carry a normal load of books with only a slight sag. Push past a metre and you are asking a lot of one board; if you want a wider unit, add a centre divider instead of buying thicker oak.
A sensible cut list for a four-shelf unit:
- Two uprights: 1150 × 220 × 20mm
- Four shelves: 886 × 220 × 20mm, allowing a 7mm housing at each end
- Four 8mm oak pegs per shelf: 32 pegs, cut from dowel
Tools and Cutting the Boards to Size
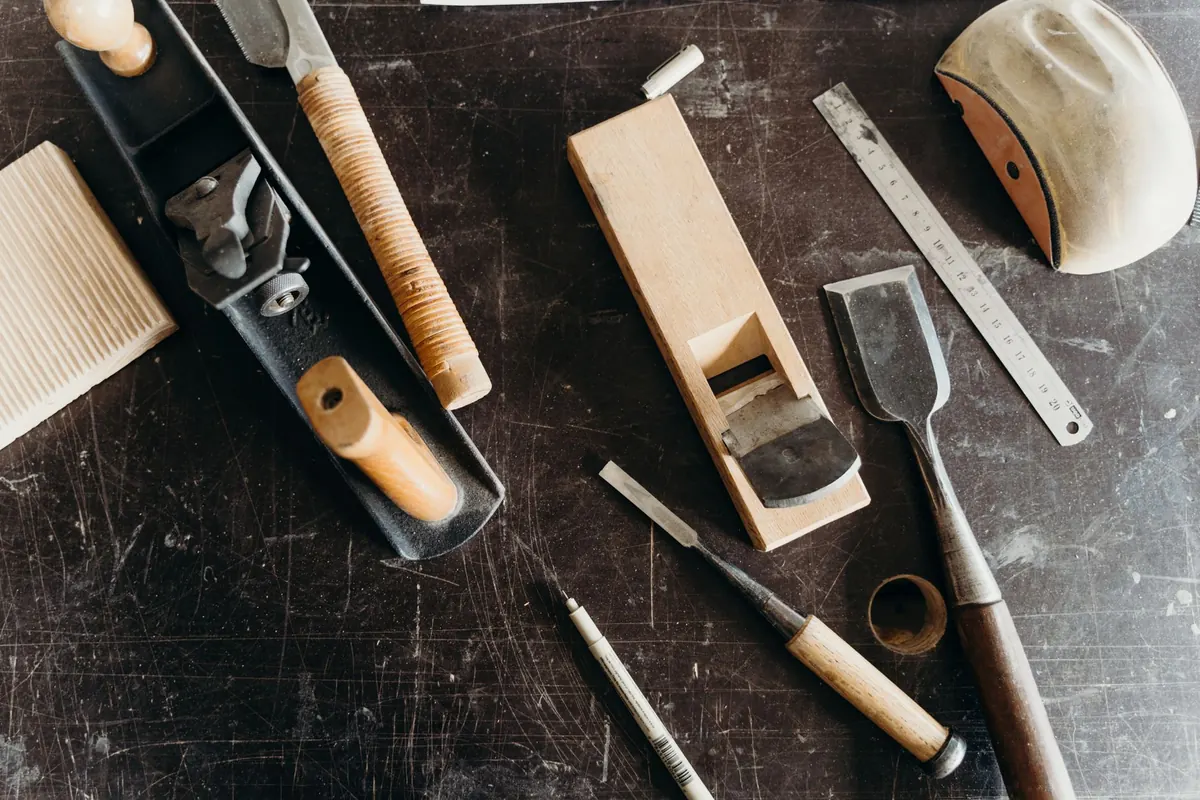
You do not need much. A sharp No. 4 or 5 bench plane, a rip-filed tenon saw, a crosscut saw, bevel-edge chisels in 6, 12 and 20mm, a marking gauge, a 300mm combination square, a knife, a mallet, a brace with an 8mm bit, and a card scraper. Clamps are useful but a couple of good ones are enough.
Start with the milling. Plane one face flat, then work one edge straight and square to it. These two surfaces are your references for every mark you make afterwards, so take the time to get them right. Gauge the thickness from the face side, plane the second face down to the lines, then mark the widths from the face edge and plane to those.
Cut to length with the crosscut saw. Score the line with a knife against the square, then pare a shallow V on the waste side with a chisel. That little wall of fibres guides the saw and stops it wandering off the line.
Cutting the Housing Joints
Housings are shallow grooves across the uprights that hold the shelves. Make them about one third of the upright's thickness — roughly 6mm deep in 20mm oak — and cut them tight so the shelf needs a firm push from a mallet rather than a hammer.
- Set the marking gauge to the shelf thickness and mark two lines across each upright for every shelf, working from the face side and face edge so all your measuring comes from the same surfaces.
- Knife the lines deeper, then saw along the waste side of each line with the tenon saw, down to the gauge line. The saw cuts the walls; you only have to clear the middle.
- Chop the waste with a 12mm chisel, starting at the centre of the groove and working out toward each end so the edges stay crisp.
- Pare the floor flat with the chisel or a router plane and check it with a small straightedge.
- Test each shelf in its groove. It should seat with a few firm taps and no wobble.
Assembly and Pegging
Dry assemble the whole thing first, then measure both diagonals with a tape. If they match, the frame is square; if not, ease the joints and try again before any glue goes near it.
Spread PVA on the housing floors and the shoulders, assemble, and clamp gently. Check the diagonals once more. Now drill 8mm holes through each upright into the shelf end, offsetting the hole about a millimetre toward the joint floor so the peg pulls the shelf down tight as it seats. Glue the pegs, drive them home, and wipe the squeeze-out with a damp rag while it is still soft. Cut the pegs flush once the glue has set, then plane or pare them level with the side.
Finishing Oak
Plane and scrape where you can. A sharp iron leaves oak looking warmer than sandpaper does, and the surface takes oil more evenly. If you do sand, stop at 220 grit, then wipe the wood with a damp cloth to raise the grain, let it dry, and sand lightly again.
Three thin coats of tung oil or a hard wax oil will protect the shelf without hiding the grain. Wipe it on, leave it twenty minutes, then buff off what has not soaked in. Let each coat dry before the next.
One oak-specific warning: the tannins in oak react with iron and leave grey-black stains. Wipe your plane irons and chisels with a lightly oiled rag after use, and never leave a damp steel clamp sitting on bare boards overnight.
Small Habits for a Long Life
Sit the finished shelf on the floor and check for rocking. A couple of strokes with a plane on the offending foot is usually enough, or a thin shim under a corner. Felt pads underneath protect wooden floors and make the unit easy to slide.
If your shelf is taller than about 1.5m, fix it to the wall — a simple L bracket into a stud is cheap insurance in a house with children or a cat. Re-oil once a year, or whenever the surface starts to look dry, and keep it out of direct sun and away from damp walls, where oak will cup and twist. Looked after this way, a hand-cut oak bookshelf is the sort of thing that gets handed down rather than replaced.
Photo: FOX ^.ᆽ.^= ∫ / Pexels
Related posts
More stories you’ll love reading