

A dull chisel is not just annoying. It is dangerous. A sharp edge bites into timber cleanly and goes exactly where you push it. A blunt one skates across the surface, then slips when you least expect it. Learning to sharpen is the single biggest improvement most beginners can make to their woodworking, and it is far less mysterious than the tool catalogues suggest.
You need surprisingly little: a flat surface, a couple of stones, a strop and ten minutes of patience. The technique is simple and repeatable once you understand what is actually happening at the edge.
What You Are Trying to Achieve
A chisel is a wedge of hardened steel. Sharpening does not create a new edge so much as refine the meeting point of two surfaces: the flat back and the bevel. Where those two planes intersect, you get the cutting edge. Everything else in sharpening is about making those two surfaces meet as cleanly as possible.
That is why the back matters as much as the bevel. A back that is not flat will never meet the bevel properly, no matter how much time you spend on the bevel side. New chisels usually need a few minutes of work on the back before any bevel sharpening makes sense. Flatten the first inch or so behind the edge, then leave it alone for the rest of the chisel's life except for light maintenance.
Choosing Your Sharpening Angle
The bevel angle is a compromise between sharpness and durability. A thin, low angle cuts beautifully but folds under pressure. A steep angle holds up but feels blunt even when it is sharp.
For most bench chisels, a primary bevel of 25 degrees is the standard starting point. It is a reasonable balance for general joinery in softwoods and hardwoods alike. If you are chopping mortises in oak, or you use a mallet heavily, 30 degrees will survive longer between sharpenings. If you are paring end grain on a fine cabinet job, 20 degrees is lovely while it lasts, but expect to revisit the stones more often.
Many woodworkers use a two-stage approach: a primary bevel at 25 degrees and a small micro-bevel at 30 degrees right at the tip. The micro-bevel is tiny, no more than a few strokes, but it adds real strength without noticeably harming performance.
Whatever you choose, pick one angle and stay with it. Constantly changing angles means you spend your sharpening time removing metal instead of refining an edge.
Stone Progression
Sharpening is a process of removing scratches with finer scratches until the edge is polished. Each stone in your sequence erases the marks left by the previous one. Skip a step and you will spend twice as long on the finer stone trying to do the coarser stone's job.
A simple and entirely adequate setup looks like this:
- Coarse stone (around 220–400 grit): for reshaping a damaged edge, resetting a bevel, or flattening a new chisel. You will not use this often once your tools are in order.
- Medium stone (around 1000 grit): the workhorse. This is where the bevel is actually formed and most of your time is spent.
- Fine stone (around 4000–8000 grit): polishes the edge and removes the scratches left by the medium stone.
- Strop with compound: the final refinement, taking the edge from sharp to genuinely keen.
Water stones cut quickly but need flattening regularly and must be soaked or sprayed before use. Oil stones are slower but stay flat for longer and are forgiving with beginners. Either works. Consistency matters far more than brand.
The Sharpening Process, Step by Step
- Flatten your stones. A dished stone will round over your bevel no matter how careful your technique. Check with a straightedge before you start.
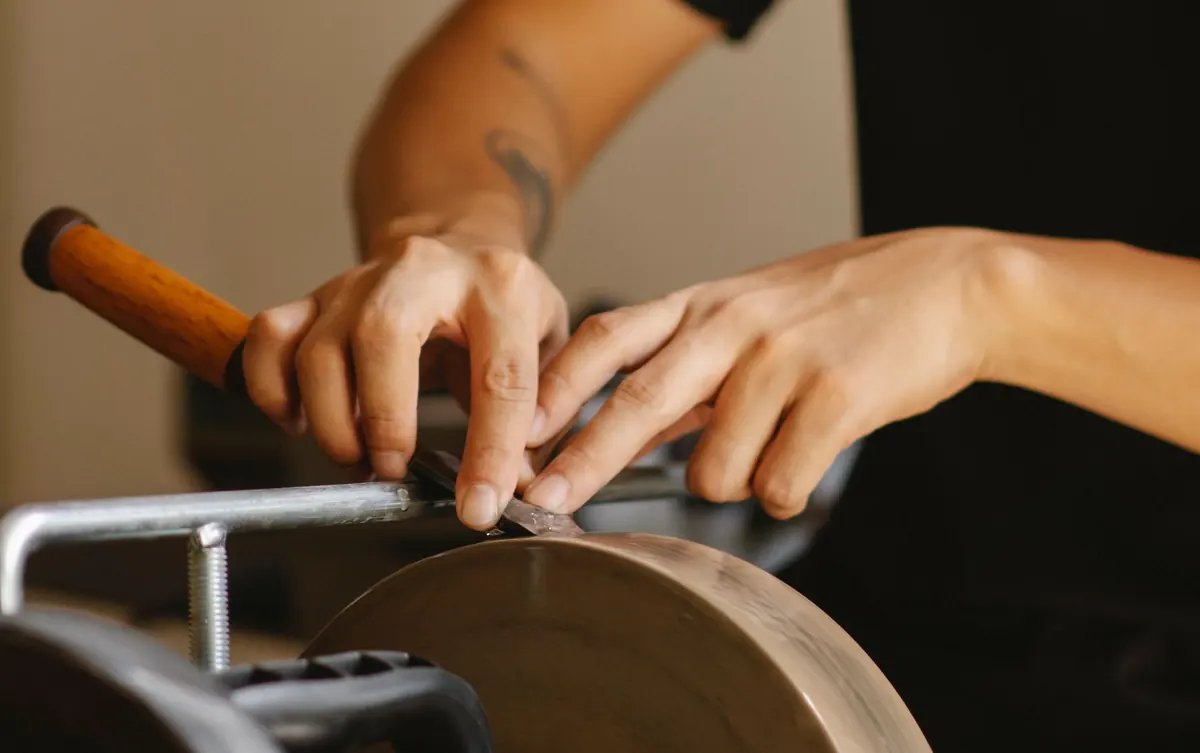
- Set the angle. Use a honing guide if you are new to this. It holds the blade at a consistent angle and removes the biggest variable from the equation. Freehand sharpening is a fine goal, but learn the angles with a guide first.
- Work the bevel on the medium stone. Push the blade away from you, or use a back-and-forth motion, keeping the edge in contact throughout. Ten to twenty strokes is usually plenty unless you are reshaping.
- Feel for the burr. After a dozen strokes, run your fingertip from the back of the blade towards the edge. On the flat side you should feel a tiny, rough catch. That is the burr, and it tells you the bevel has reached the very tip. Do not skip this check.
- Flip and remove the burr. Lay the flat back on the stone and pull it a few times, keeping it perfectly flat. The burr should disappear.
- Repeat on the fine stone. Same motion, fewer strokes. Feel for a smaller burr, then remove it from the back again.
Once the burr appears reliably on each stone, you know the edge is ready for the next stage. Chasing the burr is the single most useful habit in sharpening.
Stropping for a Razor Edge
Stropping is not optional polish, it is the step that turns a working edge into something that shaves. Load a leather strop with a fine abrasive compound, then draw the chisel across it with the bevel flat on the leather, edge trailing, as though you are pulling the blade backwards away from the edge.
Ten to fifteen passes on the bevel, then a couple of flat passes on the back. Keep the angle consistent; if you lift the handle and round the bevel, you undo the crispness you just created. Strop between sharpenings and you will find you need the stones far less often.
Testing for a Razor Edge
There are three tests worth knowing, and they get progressively stricter.
The first is the paper test. Hold a sheet of ordinary printer paper by one edge and slice downwards. A sharp chisel glides through with no tearing. A dull one crushes and snags.
The second is the shaving test, done on the hair of your forearm. Rest the back of the blade flat on your skin, lift the handle slightly, and push gently. A properly sharpened chisel will take hair cleanly. Be careful and go slowly; this is the test that gives sharpening its reputation for blood.
The third is the end grain test, and it is the one that matters most in the workshop. Take a piece of hardwood, stand it on end, and pare across the end grain. A sharp chisel leaves a polished, glassy surface. A dull one leaves a rough, crumbly edge and tells you to go back to the stones.
A Workable Routine
Sharpen little and often rather than waiting for a chisel to become unusable. A few strokes on the fine stone and a quick strop at the end of each session will keep an edge in good order for weeks. Reserve the coarse stone for real damage, and check the bevel angle with a simple guide or a reference block when something feels off.
Most importantly, practice on a chisel you do not care much about. Sharpening is a physical skill, and your hands will learn the angles faster than any explanation can teach them. Once the burr rises predictably and the paper slices cleanly, you have the whole method. Everything after that is refinement.
Sharp tools do not just cut better. They make you a more confident woodworker, because you stop guessing what the blade will do.
Photo: Ono Kosuki / Pexels
Related posts
More stories you’ll love reading